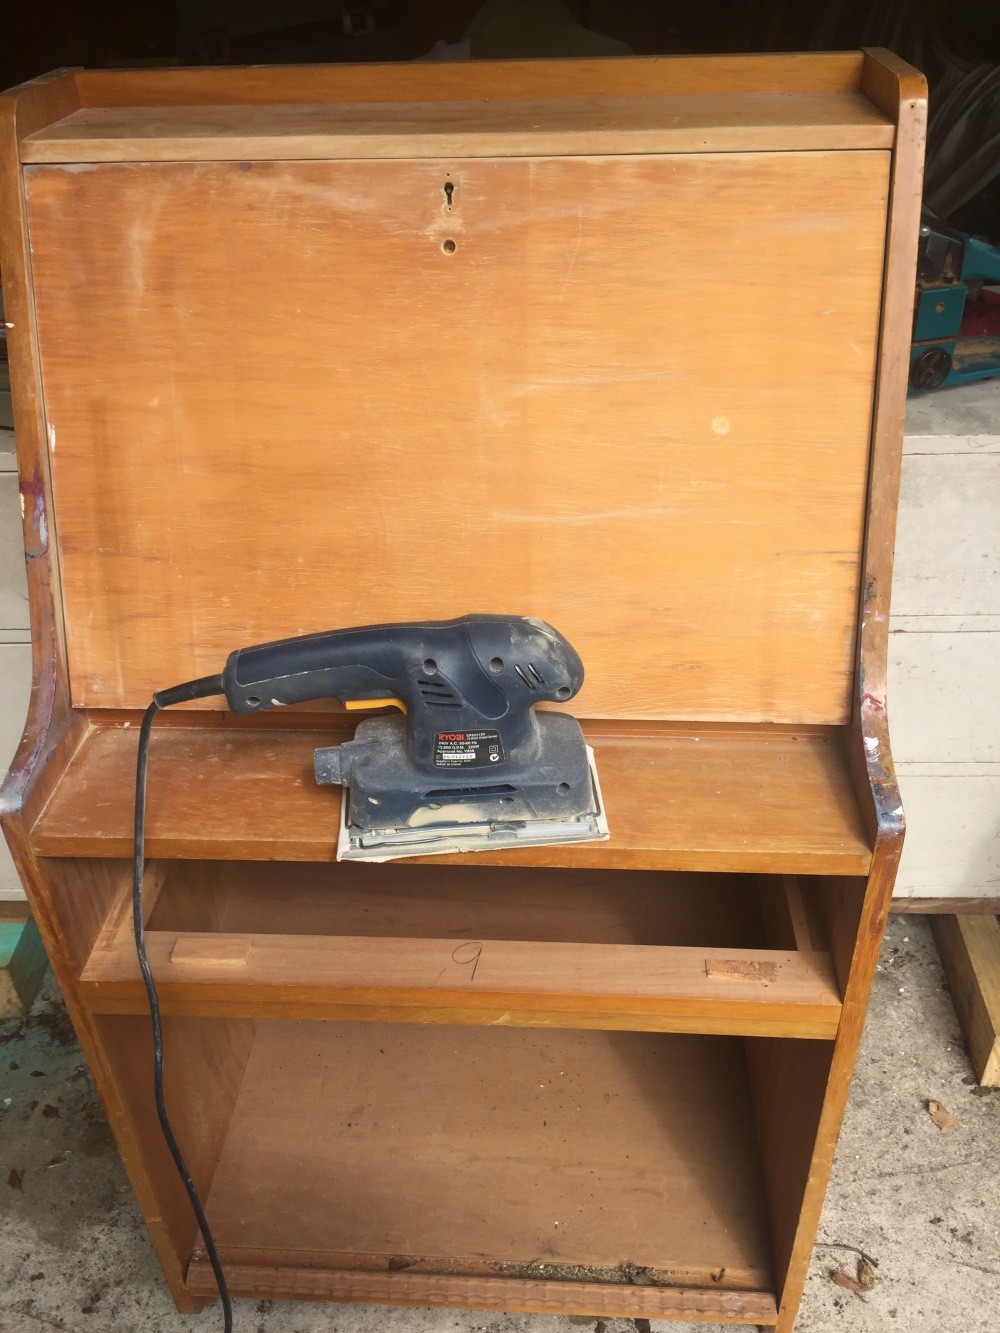
So, today I began my desk project. I am going to repaint this so I knew I just needed to sand it all back to get the gloss off.
I have procrastinated for 2 weeks and poured over Pinterest and Facebook pages to learn how to start. What I have learned from that is these 2 weeks invested in staring at a computer and phone screen and procrastinating about beginning was a waste of time compared to the 2 hours I just spent outside sanding. The one hot tip I did learn off Facebook is to cover my hair when sanding as wood dust gets everywhere. That was extremely handy as wood dust & dreadlocks are not good friends so I donned a head tube which left me looking like a teletubbie. But luckily the fashion police did not patrol my garage today.
In my separation I was lucky enough to have been left a whole pile of stuff in the garage. Stuff I had no idea what I would ever use it for. I can only presume he could not be bothered taking it, so it was easier to leave for me to sort out. I have cursed all this ‘stuff’ a lot over the past 18 months but are beginning to like it. Today I unearthed an electric sander and sandpaper. So what was looking like a daunting task was great. I still hand-sanded the awkward to get into bits but that was easy to do as the large parts were completed with the electric sander.
I chose to take the keyhole and nails out and put them aside to sand behind it, but not to unscrew the door/desk flap. I chose to not unscrew this as I thought it would be too difficult to line it all up again with the lock and I have not advanced to that level of difficulty yet.
Here is what I learned today from sanding back the old varnish and paint….
- Head tubes are handy as it really is dusty.
- Next time wear safety glasses and earmuffs as it was pretty loud (& there is that dust issue again!)
- There is a little clicky button at the side of the sander that keeps the power on, use it right from the start instead of finding it at the end.
- The harder you push the sander with 2 hands, the better it sands (see above in regards the little clicky button).
- If unscrewing anything to put back on at a later date, stick them together then put in a container with the others.
- Sanding is very satisfying!
- The higher the sandpaper number, the less gritty it is. And the less gritty it is the less it sands. I used a 220 after using a 120 for ages and not getting anywhere.
- Replace the sandpaper often. And keep the last piece of sandpaper nearby to measure the new piece as its quite fiddly to get it back into the sander. To long and it needs a trim. Too short and it is just annoying as it is not good for anything except sanding by hand.
- Keep a rag close by to wipe off the dust created as it still sticks to the desk.


I love this!
LikeLike
Thanks so much! It’s a bit of trial and error but I figure I can’t do much more wrong than what is already there!
If you know of any other DIY / upcycling blogs for me to flow please let me know……i’m all a bit new to this!
LikeLiked by 1 person
Look on Pinterest…under dresser makeovers. Also go on ‘Hometalk’ so many crafters are there.Best of luck honey…
LikeLike
Thanks so much, I will keep my stalking of your blog going haha 🙂
LikeLiked by 1 person
You know what…check out Rustoleums website…The chair I did that you commented on, was done with the Rustoleum Chalk Paint. The colors are so pretty. They even have a stain that enhances the grain, so pretty, lots of colors.
LikeLike
Check out my Trash to Treasure section of my menu. Lots of stuff I found and redone.
LikeLike
Will do…thanks so much Kelley 🙂
LikeLiked by 1 person
Hi ! I nominated you for the Blue Sky Award. I love your creations on your site…you can see your nominations here https://kelleysdiy.com/2017/03/22/blue-sky-nomination/ Copy and past the award and rules on your website…Congrats!!!!
LikeLike
Thanks so much Kelley! 🙂
LikeLiked by 1 person
You are sooooo deserving honey…and this is a bribe…you and hubby can come and help me with the popcorn ceiling. hhaaa
LikeLike
popcorn ceiling! Sure, we will just hop on a plane from NZ and zoom on over….put the kettle on we should be there for lunch (in a few days) hahahaha
LikeLiked by 1 person
You got it honey…I’m making up the guest room just for you two. I can take it down…just the after is what I am worried about.
LikeLike
oh, Im only good at destroying stuff. Maybe next time haha.
LikeLiked by 1 person
Ohh,so you like demolition!
LikeLike
https://kelleysdiy.com/2017/01/17/make-your-own-chalkboard-paint/
LikeLike
Wow Megan! Go you! So pleased you are opening yourself up to new possibilities and gaining joy from tapping into your creative side! You have amazing vision and I can’t wait to see how your projects end and your journey of growth develops! :0)
LikeLike
Thanks Tracey, your words are awesome 🙂 It’s a cool journey, the one of self discovery. I’m certainly not arty at all, I have great ideas in my head then putting them to fruition is the difficult part. I shall see what happens next lol
LikeLike